The Problem
Mailchimp gives you an embedded form you can paste into your website. It works — but it uses Mailchimp's fonts, Mailchimp's layout, and Mailchimp's styling. On a Webflow site you've spent time designing, it sticks out immediately.
The standard workaround is to paste Mailchimp's action URL directly into Webflow's form settings. That keeps your design intact, but creates a new problem: Webflow's success and error states stop working, and subscriber group checkboxes don't map correctly to Mailchimp.
There's a better way. You take just the action URL from Mailchimp, build your form entirely in Webflow, and add a small JavaScript snippet that handles the submission correctly. Your form looks exactly like your site. Success states work. Group checkboxes work. No Zapier. No third-party tools.
What You'll Need
- A Mailchimp account with an audience set up
- A Webflow site (Webflow includes jQuery by default, which the script uses)
- Access to your Webflow page's Custom Code settings
Step 1: Set Up Your Subscriber Groups in Mailchimp
Subscriber groups let people choose which emails they want to receive — for example, a magazine, a daily devotional, or a monthly newsletter. Set these up in Mailchimp before building your form.
- In Mailchimp, go to Audience → Subscriber Preferences
- Click Edit on your Preferences Center
- Add your group categories and the items under each one
- Save — Mailchimp assigns each item a numeric ID you'll use later
Step 2: Get the Action URL and Group IDs from Mailchimp
In Mailchimp, go to Forms → Other forms. You'll see your embedded forms listed there. Click on your form, then click through the Form Fields editor and hit Continue. On the "Your form is ready!" page, click Copy Code.
Paste that code into a text editor. You're looking for two things:
1. The action URL — on the line that starts with <form action=:
https://yoursite.us6.list-manage.com/subscribe/post?u=XXXXXXXX&id=XXXXXXXX
2. The group IDs — in the checkbox name attributes throughout the code:
name="group[55529][32]"   → The Apostolic Faith Magazine
name="group[55529][1]"    → Daybreak Devotional
name="group[55529][64]"   → Daily Devotional
name="group[55529][128]"  → Legacy of Faith
The format is always group[AUDIENCE_ID][GROUP_ITEM_ID]. Write down each one next to its label — you'll need them in the next steps.
Step 3: Build Your Form in Webflow
Design your subscribe form in Webflow however you want it to look. A few things matter for the connection to work:
- Give the Form Block a Name of
mc-embedded-subscribe-form— this is what the JavaScript listens for - Add an Email input with the name
EMAIL - Add Text fields for first and last name with names
FNAMEandLNAME - Add a Checkbox for each subscriber group, and set each checkbox's field name to its Mailchimp group ID — for example
group[55529][128] - Leave Send to as Webflow — do not paste the action URL into the form Action field
The reason you leave the Action field empty is that the JavaScript handles the submission instead. This is what allows Webflow's success and error states to keep working.
Step 4: Add the JavaScript
Go to your Webflow page settings, find Custom Code, and paste the following into the footer code section:
<script>
  const ACTION_URL = 'YOUR_MAILCHIMP_ACTION_URL_HERE';

  const checkboxMap = {
    'group[55529][32]':  'group[55529][32]',   // Magazine
    'group[55529][1]':   'group[55529][1]',    // Daybreak Devotional
    'group[55529][64]':  'group[55529][64]',   // Daily Devotional
    'group[55529][128]': 'group[55529][128]'   // Legacy of Faith
  };

  document.getElementById('wf-form-mc-embedded-subscribe-form')
    .addEventListener('submit', function () {
      let submissionUrl = ACTION_URL;
      const inputs = this.querySelectorAll('input');
      inputs.forEach(function (input) {
        const type = input.type;
        let name = input.name;
        if (type === 'checkbox' && checkboxMap[name]) {
          name = checkboxMap[name];
        }
        if (type === 'email' && input.value.length > 1) {
          submissionUrl += '&EMAIL=' + encodeURIComponent(input.value);
        } else if (type === 'text' && input.value.length > 1) {
          submissionUrl += '&' + encodeURIComponent(name) + '=' + encodeURIComponent(input.value);
        } else if (type === 'checkbox' && input.checked) {
          submissionUrl += '&' + encodeURIComponent(name) + '=true';
        }
      });
      $.ajax({
        type: 'POST',
        crossDomain: true,
        dataType: 'jsonp',
        url: submissionUrl,
        data: {}
      });
    });
</script>
Replace YOUR_MAILCHIMP_ACTION_URL_HERE with the URL from Step 2. Update the checkboxMap to match your own group IDs and labels. Webflow includes jQuery on every site by default, so no extra setup is needed.
Step 5: Test It
Publish your Webflow site, fill out the form with a test email, and check your Mailchimp audience to confirm the subscriber was added with the correct groups checked.
If a subscriber appears but no groups are checked, double-check that the checkbox field names in Webflow exactly match the group IDs in the checkboxMap — they need to be identical, including the brackets.
Step 6: Adding a New Group Later
When you add a new group to Mailchimp and a new checkbox to your Webflow form, it still won't work until you update the script too. Here's the complete process:
- Add the new group item in Mailchimp's Preferences Center
- Go back to Forms → Other forms, open your embedded form, click through to the embed code, and find the new group's ID in the checkbox
nameattributes - Add a new checkbox to your Webflow form with that group ID as its field name
- Add the new entry to the
checkboxMapin your page custom code - Publish Webflow
Skipping step 4 — updating the checkboxMap — is the most common reason a new checkbox appears to work but never actually subscribes anyone to that group.
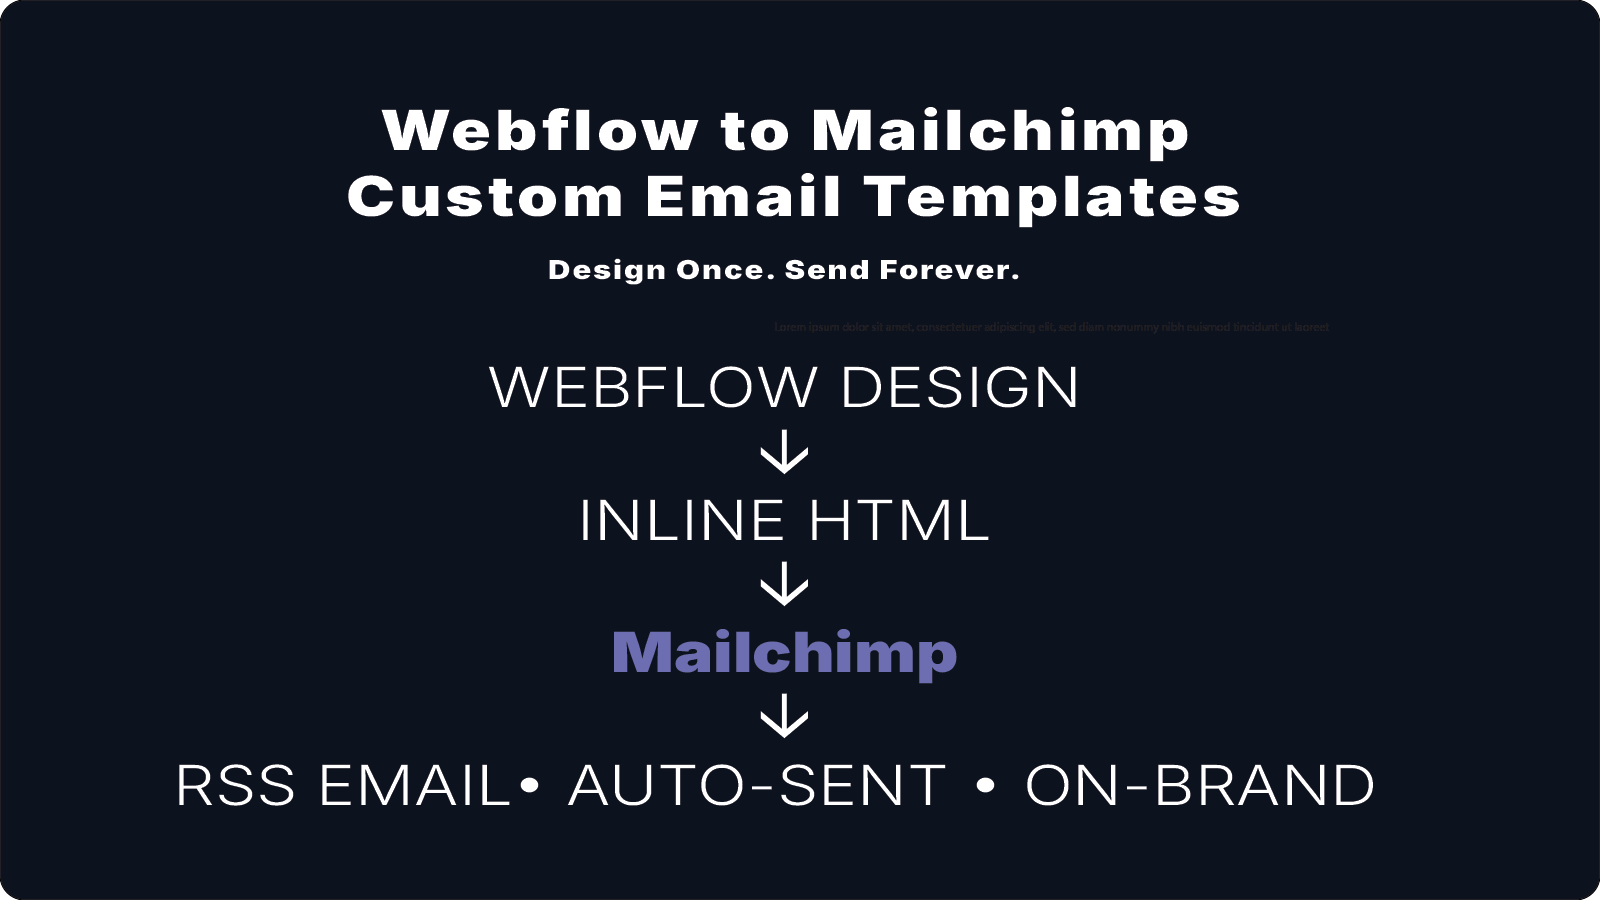
Step 7: Connect It to a WebflowRSS Campaign in Mailchimp
Once subscribers are flowing into Mailchimp with the right groups selected, connect each group to an automated RSS campaign that sends your latest Webflow content automatically.
- In Mailchimp, go to Campaigns → Create campaign → Email → Automated → Share blog updates
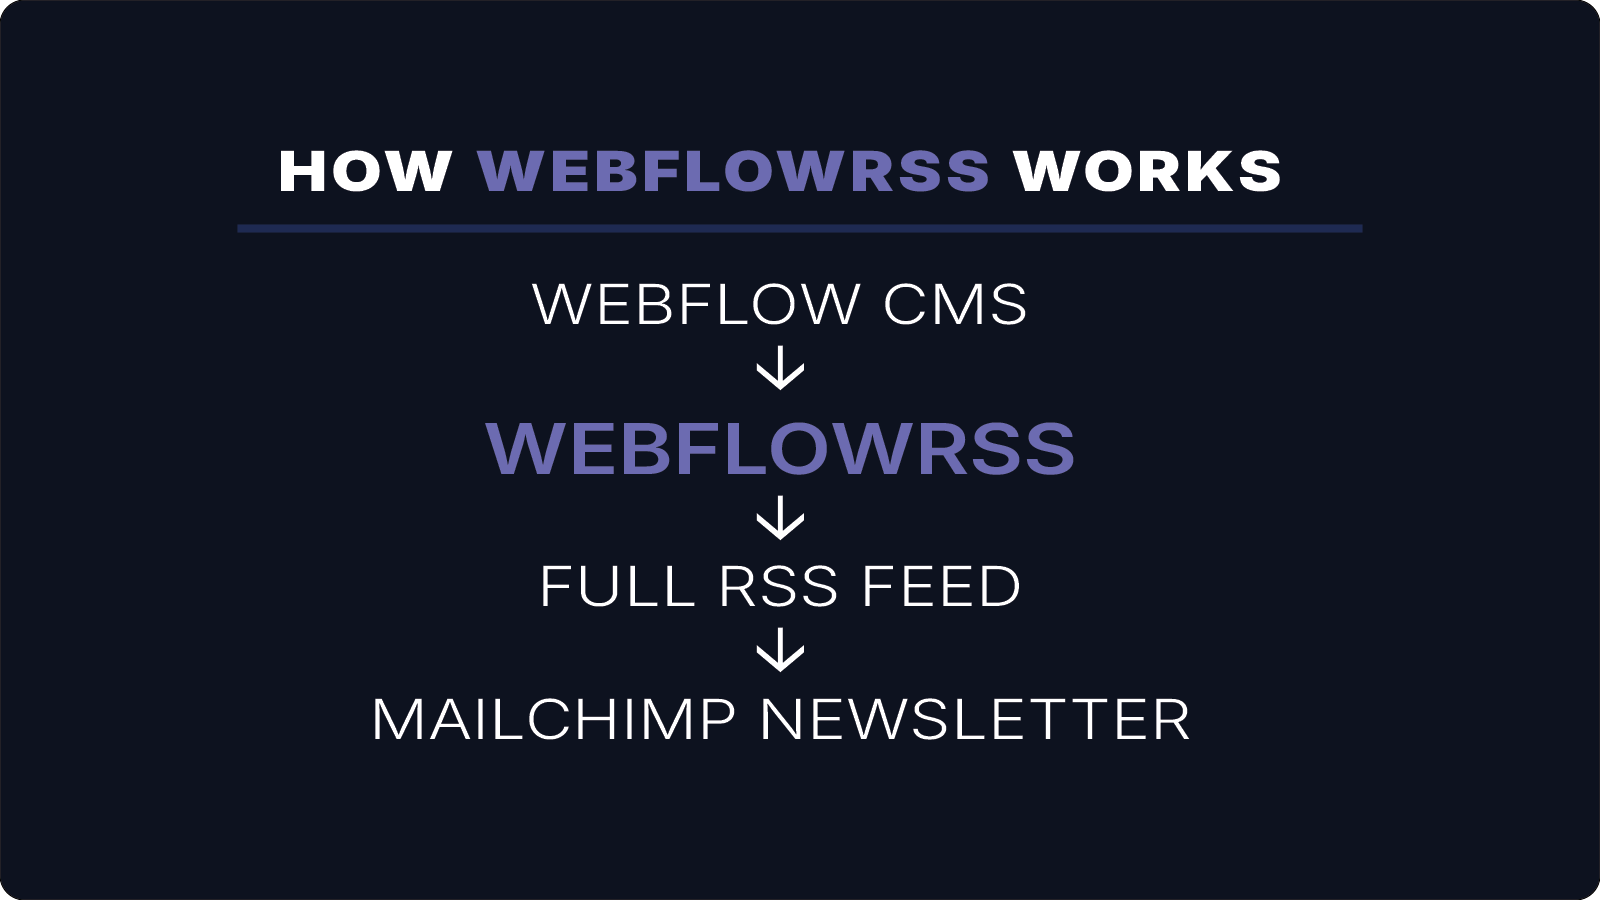
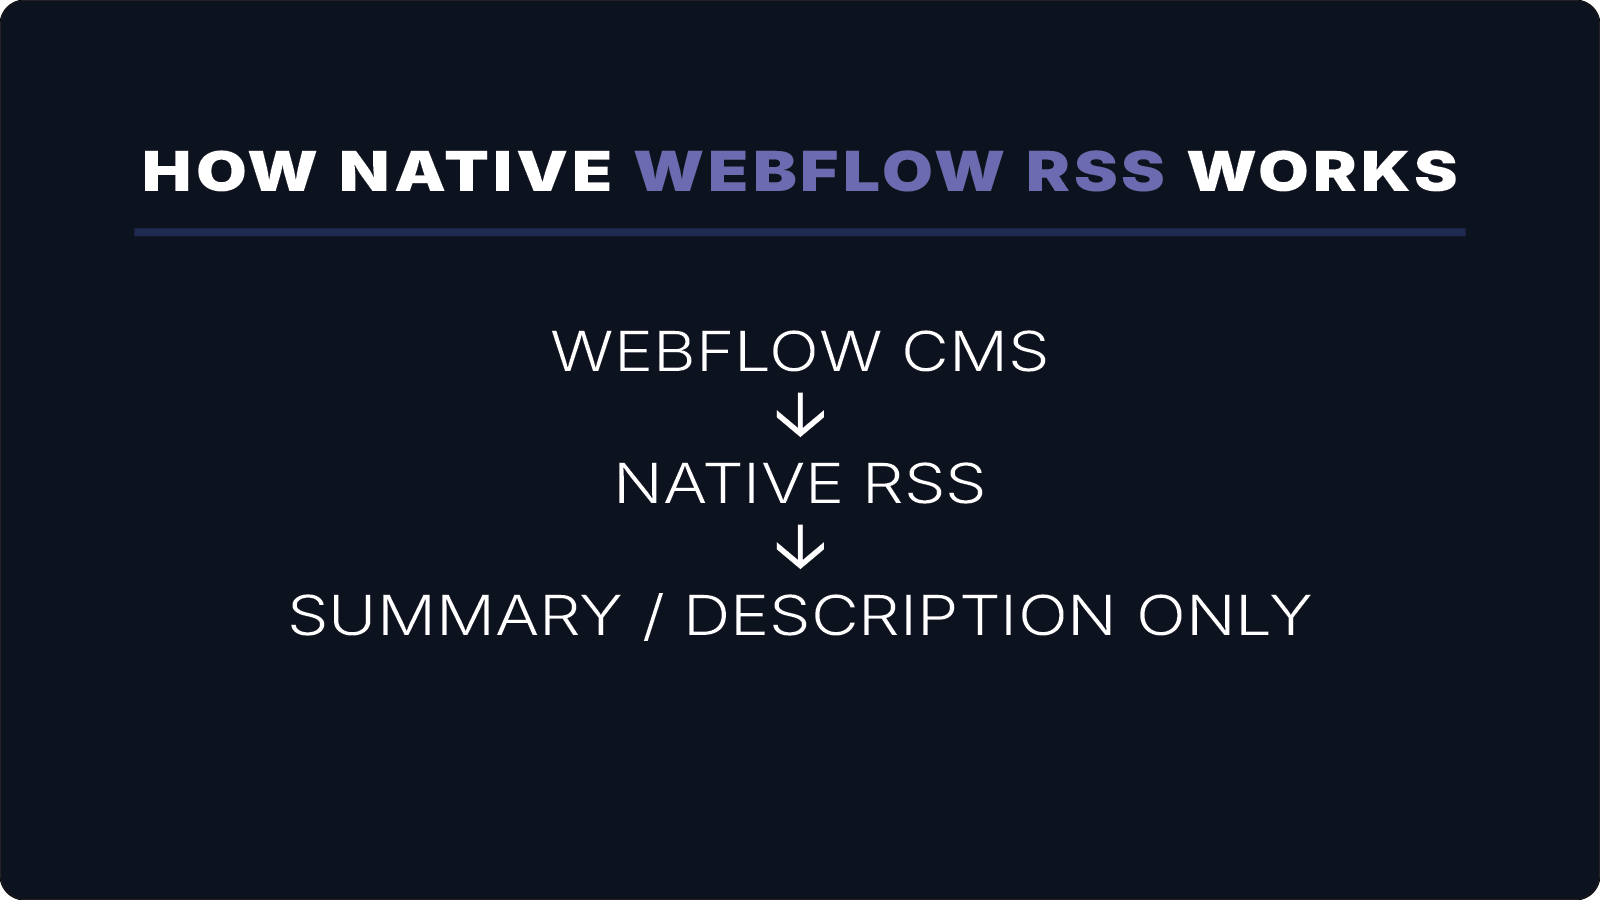
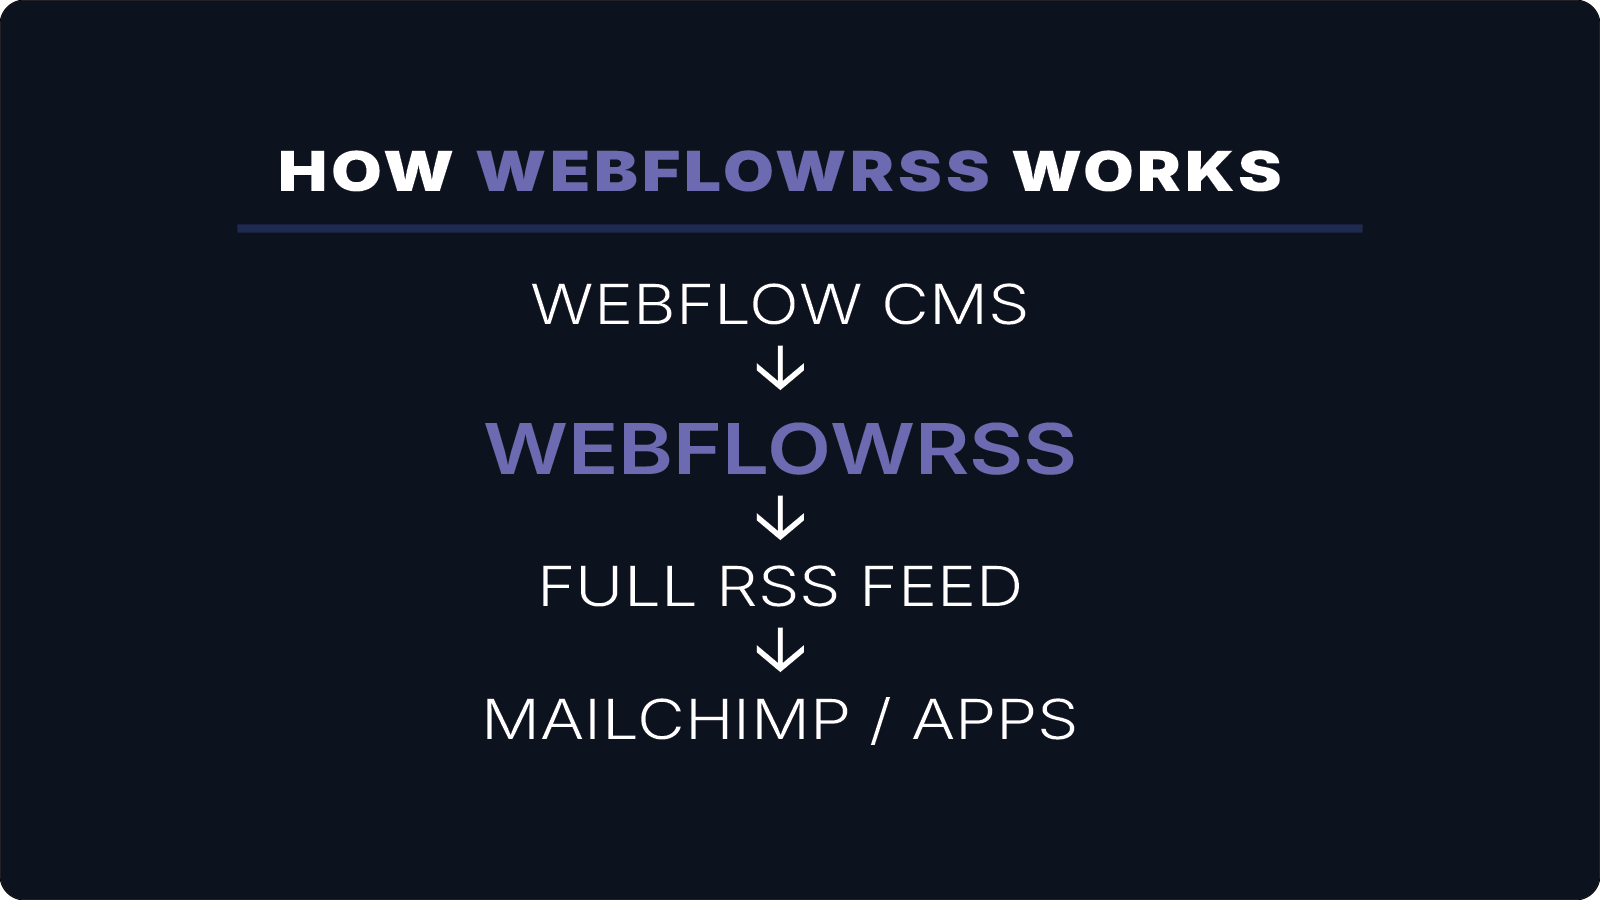
- Enter your WebflowRSS feed URL — this is the full-content feed generated by WebflowRSS, not Webflow's native RSS URL. Webflow's native RSS only sends titles and summaries; your WebflowRSS feed includes the complete article so the full content appears in the email
- Set your send schedule
- Under Send to, choose the subscriber group this campaign should go to
- Select your custom HTML email template
- Activate the campaign
The result: subscribers choose exactly what they want to receive, your form looks like it belongs on your site, and the right content goes to the right people automatically — without any automation tools in between.
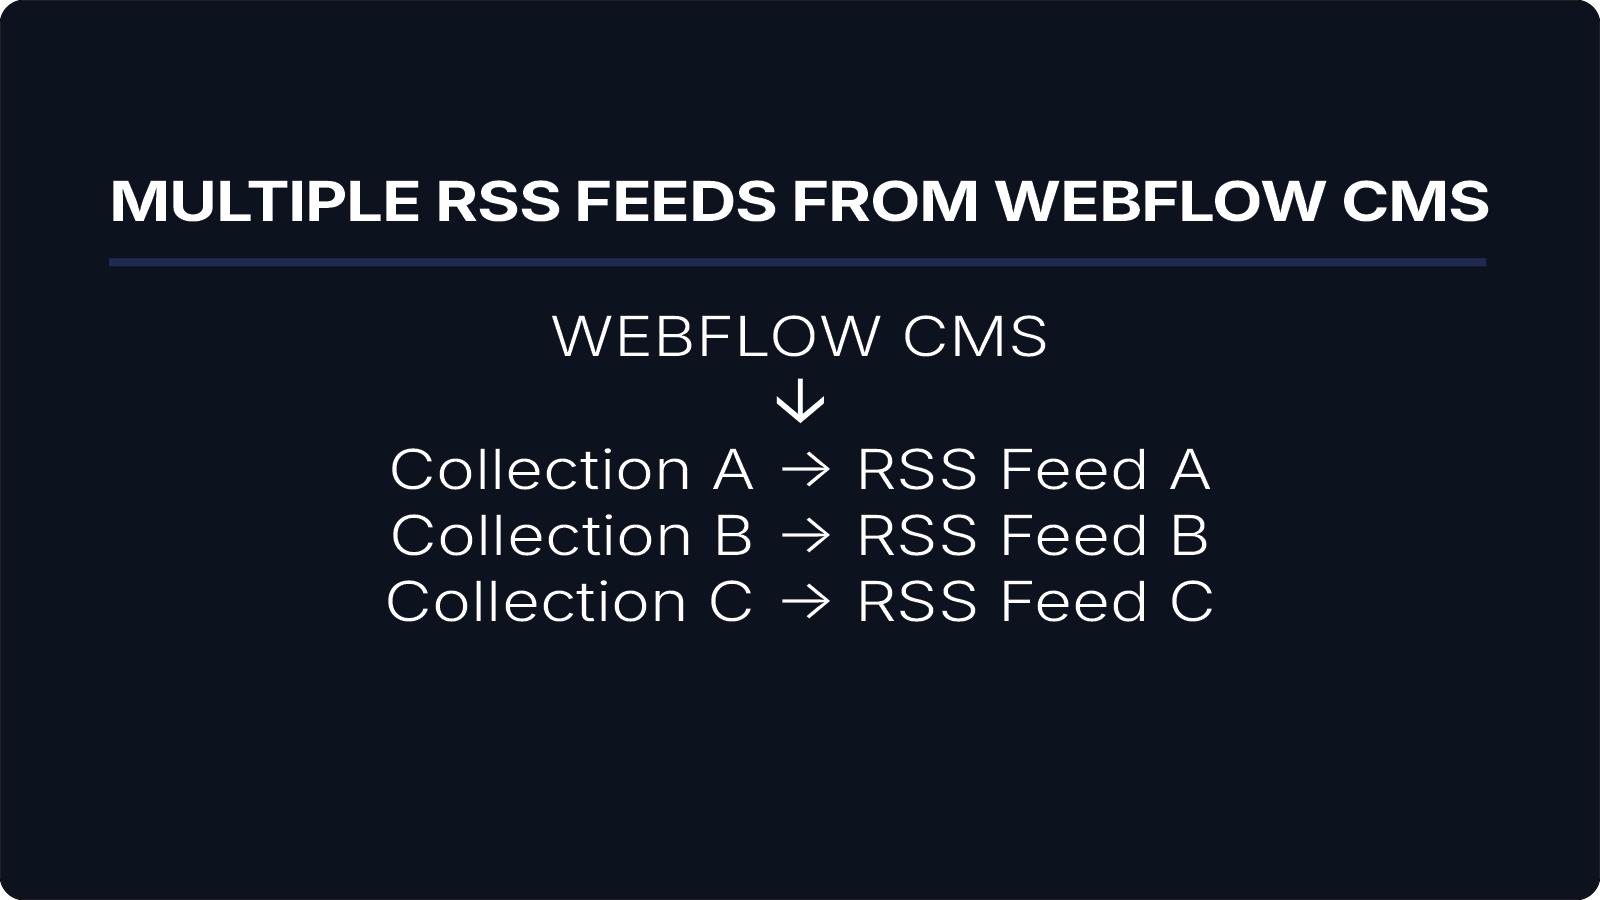
Don't have a full-content RSS feed from your Webflow CMS yet? Request setup here.